New helper classes for working with the ConnectAPI

I was, as my friend Becky will tell you, a bit of a Chatter sceptic when it was first released. But over time, I have begun to see huge potential for using Chatter as a notification and collaboration tool. So I was excited when they released the ConnectAPI – an Apex wrapper for the Chatter REST API. As this excellent post explains, the ConnectAPI definitely makes consuming Chatter feed data easier.

But writing to Chatter using the ConnectAPI has often seemed more challenging than it should, especially when you wanted to use features like @mention. You can’t write a post containing @mention using regular Apex, so you have to use the ConnectAPI. But writing a simple post like ‘Happy Birthday @Peter Churchill! ‘ requires 15 lines of code, because you have to use the messageSegment objects:

ConnectApi.MessageBodyInput messageInput = new ConnectApi.MessageBodyInput();
messageInput.messageSegments = new List<ConnectApi.MessageSegmentInput>();

ConnectApi.TextSegmentInput textSegment = new ConnectApi.TextSegmentInput();
textSegment.text = 'Happy Birthday ';
messageInput.messageSegments.add(textSegment);

ConnectApi.MentionSegmentInput mentionSegment = new ConnectApi.MentionSegmentInput();
mentionSegment.id = '005D00000015tjz'; // The ID of the user to mention.
messageInput.messageSegments.add(mentionSegment);

textSegment = new ConnectApi.TextSegmentInput();
textSegment.text = '!';
messageInput.messageSegments.add(textSegment);

ConnectApi.FeedItemInput input = new ConnectApi.FeedItemInput();
input.body = messageInput;

ConnectApi.FeedItem fi = ConnectApi.ChatterFeeds.postFeedItem(null, ConnectApi.FeedType.News, 'me', input, null);

While it is nice to have the flexibility that has been made available to us with messageSegments, it also requires a significant investment in time and effort and patience to get it all working. But as we know, Salesforce has always been a company that seeks out feedback. So when Matt Lacey and I recently talked with some of the folks behind the ConnectAPI about how we were finding it difficult to use, they listened, and acted on the feedback. Last week, the ConnectAPI team released a helper class to make it easier to use @mentions! Just copy the code from the link above into your Dev Org, and suddenly you can write the same Happy Birthday post like this:

String sText = 'Happy Birthday {005E0000005LZXh}!';
ConnectApi.FeedItem fi = ConnectApiHelper.postFeedItemWithMentions(null, 'me', sText);

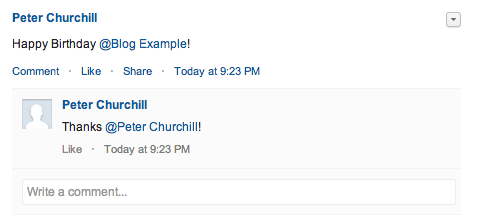
You can also post comments with @mentions – so something like this will work:

String sText = 'Happy Birthday {005E0000005LZXh}!';
ConnectApi.FeedItem fi = ConnectApiHelper.postFeedItemWithMentions(null, 'me', sText);

String sText2 = 'Thanks {005E0000001fhsc}!';
ConnectApi.Comment fic = ConnectApiHelper.postCommentWithMentions(null, fi.Id, sText2);

Screen Shot 2014-02-04 at 9.26.30 PM

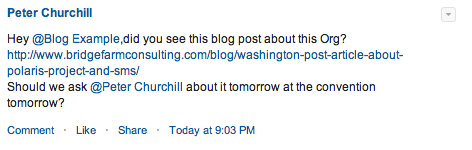
Pretty awesome.  Even better, the code will parse any links it finds as links…so you can do something like this:

String sText = 'Hey {005E0000005LZXh},did you see this blog post about this Org?'+
'http://www.bridgefarmconsulting.com/blog/washington-post-article-about-polaris-project-and-sms/'+ '\n' +
'Should we ask {005E0000001fhsc} about it tomorrow at the convention tomorrow?';

ConnectApi.FeedItem fi = ConnectApiHelper.postFeedItemWithMentions(null, 'me', sText);

Screen Shot 2014-02-04 at 9.28.07 PM

Hopefully, these helper classes will make their way into the final product – once developers see how easy it is to work with the ConnectAPI, I think we will see an explosion of use cases. I will be doing my part to contribute to the process – my next post will be about how you can use the ConnectAPI to share and post attachments and Chatter Files with records and users.

Washington Post Article about Polaris Project and SMS

The Washington Post wrote about the Polaris Project and the text messaging solution I helped build:

Polaris started its text hotline in March, through a philanthropic partnership with San Francisco-based cloud company Twilio, which powers text and voice customer service communications for clients such as Uber, Hulu, eHarmony and CocaCola. Victims can text “HELP” or “INFO” to the number 233733 (BeFree), where they are forwarded to Polaris’s hotline staff, who then respond from their computers through a messaging service called Chatter. Polaris has operated a voice hotline, at 1-888-373-7888, for a few years.

See the full article here

Use the New Force.com CLI for a Clean Quick Start…

Just got back from another exhausting by very fun Dreamforce!

If you were at the Dev Keynote, you would have the seen the legendary Dave Carroll demo a new Command Line Interface for Force.com. I have been trying it out this morning (thanks to Mike for his help getting me up and running!) and realized it is the perfect tool for something I seem to spend my life doing – cleaning up a new dev Org. I fire up new orgs every week, and I am always having to clear out the sample custom fields before I can get started. Why not just leave them there you ask? Soooo easy to accidentally include them in a managed package – and once there, no going back!

But with the CLI, you can just run a simple script to do that. For now, you first have to delete some references to those fields. You can probably do this via the Metadata import as well, but until I work that piece out, you still have to do the following:

    Delete Case Escalation Rules
    Delete Case Assignment Rules
    Remove Upsell Custom Links from Case from Page Layouts
    Delete Custom Upsell Link from Case

    Remove Delivery Status Custom Link from Opty Page Layouts
    Delete Link

Now you can download this file to where your force CLI binary is located, open up the terminal to that directory, type force login to run the oAuth, and finally run this command:
sh removesamplefields.txt

You’ll see it delete the fields, and now you can start building your new Salesforce1 App!

Tab Order and Visualforce

I was trying recently to get the tab order to work on my Visualforce page. I wanted the order to go down the first column, and then back to the top of column 2, and tab down that column. Easy enough right? There is an attribute called taborderhint on inputfields that sets the order of fields selected when you tab:

<apex:pageBlockSection >
<apex:inputField taborderhint="1" value="{!contact.FirstName}"/>
<apex:inputField tabindex="3" value="{!contact.Email}"/>
<apex:inputField taborderhint="2" value="{!contact.LastName}"/>
<apex:inputField taborderhint="4" value="{!contact.Phone}"/>
</apex:pageBlockSection>

But then I needed to add some inputText fields as well. There is no taborderhint attribute on inputtext, but there is an attribute called tabindex which looks like it should do the same thing. But when you do something like this, it doesn’t work:

<apex:pageBlockSection >
<apex:inputField taborderhint="1" value="{!contact.FirstName}"/>
<apex:inputText tabindex="3" value="{!contact.Email}"/>
<apex:inputField taborderhint="2" value="{!contact.LastName}"/>
<apex:inputField taborderhint="4" value="{!contact.Phone}"/>
</apex:pageBlockSection>

After scratching my head for while, and reading about various JS solutions, I finally uncovered this post on the community boards. After some impressive digging in the dev console, the user discovered that taborderhint multiples the hint by 10 – so 1 is actually being set as 10. But the same behavior is not used for tabindex. So you have to account for that when you set the values – and when you do, it all works:

<apex:pageBlockSection >
<apex:inputField taborderhint="1" value="{!contact.FirstName}"/>
<apex:inputText tabindex="30" value="{!contact.Email}"/>
<apex:inputField taborderhint="2" value="{!contact.LastName}"/>
<apex:inputField taborderhint="4" value="{!contact.Phone}"/>
</apex:pageBlockSection>

Seems odd behavior to me, but at least it works I guess!

Phone Formatting in APEX

Another problem we often face when integrating with other systems is formatting phone numbers. If you enter a phone number via the SFDC UI, it will apply standard US phone formatting to the number if it a 10 digits number. But that is being applied by the browser using JS script. If you load data into phone number fields via the API, it leaves them as they are, which doesn’t look great when a user sees the record in the UI, and it can break any phone integrations such as Skype or Google Voice that expect numbers to be formatted in a certain way.

To get round that problem, we can use another utility with a simple REGEX pattern:

public static String formatphonenumber(String cphone) {
String fphone = cphone.replaceAll('\\D','');

if (fphone.length() == 10) {
fphone = formatphonenum(fphone);
return fphone;
}
else {
return cphone;
}

}

static String formatphonenum (String s) {
s = '(' + s.substring(0, 3) + ') ' + s.substring(3, 6) + '-' + s.substring(6);
return s;
}

This one will look at the original string passed to it, remove any character that is not a digit, and if it is 10 digits long, apply the US style phone format to it to make it consistent with the UI formatted numbers.
So if we can do something like this:

String sPhoneRaw = '202-555-1234';
String sPhoneFormatted = UtilitiesDemo.formatphonenumber (sPhoneRaw);
system.assertequals('(202) 555-1234', sPhoneFormatted);

The key line is this one:

String fphone = cphone.replaceAll('\\D','');

replaceall is a standard string function in APEX, but it can use a REGEX as the pattern to search for – in this case, an NON digit. So it doesn’t matter what we get passed from another system/loaded in via the API – we can strip it back to just the digits, and then apply the format if required.

And you can see a working demo here

Email Validation in APEX

If you enter an email address into an ’email’ type field in Force.com, it will validate that the value entered is a valid email, and won’t let you save the record with a bad email. But when you are integrating Salesforce with another system, that system may not perform the same level of verification. You often need to import the record into Salesforce regardless of whether the email is valid, but need to be able to handle bad emails so you don’t try and save a record with a bad email address.

So I always create a static method in a Utility class that I can use to check an email and return a boolean to tell me if the email is valid or not. If not, I can then save the email address to a non-email text field, and flag the record for review by a business user. The method uses a pattern match with a REGEX for matching against emails. I have always used the example from this post. But if you search for Email and Regex, you’ll find lots of examples. The one below seems to handle most scenarios though.


public static Boolean checkEmail (String semail) {
String InputString = semail;
String emailRegex = '([a-zA-Z0-9_\\-\\.]+)@((\\[a-z]{1,3}\\.[a-z]{1,3}\\.[a-z]{1,3}\\.)|(([a-zA-Z0-9\\-]+\\.)+))([a-zA-Z]{2,4}|[0-9]{1,3})';
Pattern MyPattern = Pattern.compile(emailRegex);

// Then instantiate a new Matcher object "MyMatcher"
Matcher MyMatcher = MyPattern.matcher(InputString);

if (!MyMatcher.matches()) {
return FALSE;
}
else {
return TRUE;
}
} //end email check

And then in my integration code, a simple check

if (UtilitiesDemo.checkEmail (sEmail) ) {
//Use email
}
else {
handle bad email
}

You can see a working example here

Next up, formatting phone numbers from another system…

New Schema Method for Describing Multiple sObjects

If you are building ISV packages on Force.com, you quickly end up needing to do Describe calls on sObjects. Prior to Winter 14, you could either request the Describe results for a single sObject, or get the describe results for all sObjects. Most people then end up writing utility classes to cache those results into a static Map so you could retrieve the results from a Map as you needed them, and not breach any describe call limits.

But in Winter 14, there is a new Schema Method which let’s you pass in a string [] of sObjects names you want describe results for, and get back an Schema.DescribeSobjectResult [] for the results, which will prove really helpful when you need the results for two or three sObjects and a full describe seems like overkill. As ever with new Force.com releases, I also now get to go back and update all those utility classes I built/borrowed from others…

Here’s the sample code from the docs

// sObject types to describe
String[] types = new String[]{'Account','Merchandise__c'};
// Make the describe call
Schema.DescribeSobjectResult[] results = Schema.describeSObjects(types);
System.debug('Got describe information for ' + results.size() + ' sObjects.');
// For each returned result, get some info
for(Schema.DescribeSobjectResult res : results) {
System.debug('sObject Label: ' + res.getLabel());
System.debug('Number of fields: ' + res.fields.getMap().size());
System.debug(res.isCustom() ? 'This is a custom object.' : 'This is a standard object.');
// Get child relationships
Schema.ChildRelationship[] rels = res.getChildRelationships();
if (rels.size() > 0) {
System.debug(res.getName() + ' has ' + rels.size() + ' child relationships.');
}
}

Twilio + Salesforce + Polaris Project

I have worked with the Polaris Project for several years now – they are a leading organization in the global fight against human trafficking and modern-day slavery and they are transforming the way that individuals and communities respond to human trafficking.

This year, we finished a project that I am still very proud of – helping victim of human trafficking ask for help via a text message. For people trapped in a trafficking situation, sending a text message might be the best of only opportunity to ask for help. And it works

To power the text messaging service, Polaris partnered with Twilio, who this week launched Twilio.Org to help qualified non profits utilize their service with $500 of Twilio kickstart credits and 25% discount on Twilio Voice and Messaging products, and then you get to work with great guys like Rob, who helped me get everything working.

We are finishing up a new version of the code, and Polaris has agreed that I can publish that code for other organizations to use and learn from. It is still a work in progress and needs some refinement, so I’ll be making some updates to the code over the next few days, and then create a unmanaged package and some instructions about how you can get up and running with Twilio and Salesforce. I will also add in some other features over the next few weeks such as alerts to members of a Campaign.

In the meantime, here is an overview of the solution, and how Polaris is using it to help stop trafficking today…
http://www.youtube.com/watch?v=gdDc95_nq2w

Using MultiStaticResourceCalloutMock

To test the Twitter code in the previous post, MultiStaticResourceCalloutMock turned out to be a great option (with one caveat – see below).

If you’re not familiar with Mock Callouts in general, it’s a relatively new feature from Salesforce to enable developers to test callouts without actually making a callout (since that isn’t allowed during test execution). Basically, we can tell Salesforce that when it sees a request to make a callout in a test to override it with the response specified by the Mock Callout Class.

But the Twitter code poses a tricky problem – the code actually makes TWO callouts – one to get the token, and one to retrieve the data. So instead of having to use some form of test.IsRunningTest() in the callout code to catch each callout and set the mock callout there, we can use MultiStaticResourceCalloutMock feature to specify a response for each endpoint referenced in our test up front.

To use MultiStaticResourceCalloutMock, we first have to create a static resource for each response we are going to get back. I find it easiest to can get the data for the response by making a call via the browser, or doing a debug in the logs for an actual response, and then amending the code as required to make sure I have the structure correct.

Then we can create our test method:

@isTest
private static void testTwitterSingle () {

//Set the Custom Settings for the endpoint and keys
List<social_media_settings__c> sms = new List<social_media_settings__c> ();
sms.add(new social_media_settings__c (
Name = 'Twitter',
URL__c = 'https://api.twitter.com/1.1/users/lookup.json?screen_name=',
API_Key__c = 'KEYPUBLIC',
API_Secret_Key__c = 'KEYPRIVATE'));

//Then create a test contact
Contact c = new Contact (
LastName = 'Test Twitter 1', 
Twitter_Username__c = 'britishboyindc');
insert c;

Now create a mock callout for each endpoint – each instance of  MultiStaticResourceCalloutMock takes two params – the endpoint, and the name of the relevant static response to use as the returned response:

MultiStaticResourceCalloutMock multimock = new MultiStaticResourceCalloutMock();
multimock.setStaticResource('https://api.twitter.com/oauth2/token', 'TwitterBearerResponse');
multimock.setStaticResource('https://api.twitter.com/1.1/users/lookup.json?screen_name=britishboyindc', 'TwitterResultsResponse');

We can also set different response params to test success/fail responses:

multimock.setStatusCode(200);
multimock.setHeader('Content-Type', 'application/json');

Before we set the mock callouts, we need to invoke the StartTest to ensure we don’t get the DML before Callouts error:

Test.starttest();
// Set the mock callout mode
 Test.setMock(HttpCalloutMock.class, multimock);

 //I can invoke the code via a button on a contact, so let's use the extension
 contactextension_bfc bfc = new contactextension_bfc(new ApexPages.StandardController(c)); 
bfc.updatesocialmedia();
Test.stoptest();

Then query for the Contact and check the followers were updated based on the data in the static response:

Contact tconfirm = [Select Id,
 Twitter_Followers__c FROM Contact
 WHERE Id = :c.Id];
 system.assertequals(170,tconfirm.Twitter_Followers__c);
 }

The one caveat to this approach is around testing batches. I can also call my twitter code via a batch if I want to update a bunch of contacts. But as of now Spring 13 Batches and Mock Resources don’t seem to play nicely together in tests. But looking at the release notes, Summer 13 fixes this,  so I’ll post again when I can confirm that.


Twitter Authentication

If you are interacting with Twitter, you hopefully know that the old 1.0 API (that didn’t need authentication) is being retired next week. So this sort of query won’t work anymore:
https://api.twitter.com/1/users/show.json?screen_name=britishboyindc

Instead, you have to authenticate against Twitter first, get a token, and then make you request(s). On the plus side, you get access to the far richer 1.1 API, which will let you do the query above for 100 accounts at once. So if you just need to update some basic stats every night for a few hundred accounts, this makes life much easier (when people complain about Limits in Salesforce – tell them to try Twitter’s API!)

The authentication instructions look a little intimidating compared with the previous method that didn’t involve any effort, but they are actually pretty straight forward to implement in Salesforce. I am using the Application Auth process, since I don’t need to post as a user.

First, generate your consumer key + consumer secret key per the instructions. I suggest storing them in a Custom Setting – I have one called social_media_settings to store the two keys.

Then you’ll need a method to generate the bearer:

private String getBearerToken() {
//Encode them
String keyencoded = EncodingUtil.urlEncode(socialsettings.API_Key__c, 'UTF-8');
String secretkeyencoded = EncodingUtil.urlEncode(socialsettings.API_Secret_Key__c, 'UTF-8');

//Create Final Key String
String sFinal = keyencoded + ':' + secretkeyencoded;
//Convert to Blob
Blob headerValue = Blob.valueOf(sFinal);

//Build Request
HttpRequest req = new HttpRequest();
req.setEndpoint('https://api.twitter.com/oauth2/token');
req.setMethod('POST');

//Add Auth Header
String authorizationHeader = 'Basic ' + EncodingUtil.base64Encode(headerValue);
req.setHeader('Authorization', authorizationHeader);

//You need to add this to the request - proved easy to miss in instructions...
req.setBody('grant_type=client_credentials');

//Make request
Http http = new Http();
HTTPResponse res = http.send(req);
String stoken;
//Parse JSON for Bearer Token
JSONParser parser = JSON.createParser(res.getBody());
while (parser.nextToken() != null) {
if (parser.getCurrentToken() == JSONToken.FIELD_NAME && parser.getText() == 'access_token'){
parser.nextToken();
stoken = parser.getText();
}
}
//Return Token so it can be used in next call
return stoken;
}

Now you have the a way to get the Bearer Code, you can authenticate your request like this:

private void submittotwitter () {
HttpRequest req2 = new HttpRequest();
//I actually store the endpoint in the same custom setting and build dynamically, but for purposes of demo:
req2.setEndpoint('https://api.twitter.com/1.1/users/lookup.json?screen_name=britishboyindc,salesforce');
req2.setMethod('GET');

//Call Bearer token Method
//Note - unless invalidated, I believe you can store this and keep using it indefinitely, but again, to demo concept
String authorizationHeader = 'Bearer ' + getBearerToken();
req2.setHeader('Authorization', authorizationHeader);

Http http = new Http();
HTTPResponse res = http.send(req2);
String sBody = res.getBody();

//I have a Twitter Results class to de-serialize the results into (See below)
Map <String, TwitterResults> TwitterResultsMap = new Map<String, TwitterResults> ();

//You can generate one here: http://json2apex.herokuapp.com/makeApex
//I can then pass the results back as a return, or set the map as s public variable on the class

//Use native JSON parser to turn results into a list of TwitterResults
List tresults = TwitterResults.parse(sBody);
//The key is set to be the twitter handle name that I am storing in SFDC
For (TwitterResults t: tresults) {
TwitterResultsMap.put(t.screen_name, t);
}

}

So now I have the result data (followers_count, statuses_count) for all the twitter handles I queried for a map I can reference and use to update my contacts in Salesforce. There is much more you can do of course!

public class TwitterResults {

    public Integer id;
    public Integer listed_count;
    public String screen_name;
    public String url;
    public Integer followers_count;
    public Integer friends_count;
    public Integer statuses_count;

    public static List<TwitterResults> parse(String json) {
        return (List<TwitterResults>) System.JSON.deserialize(json, List<TwitterResults>.class);
    }